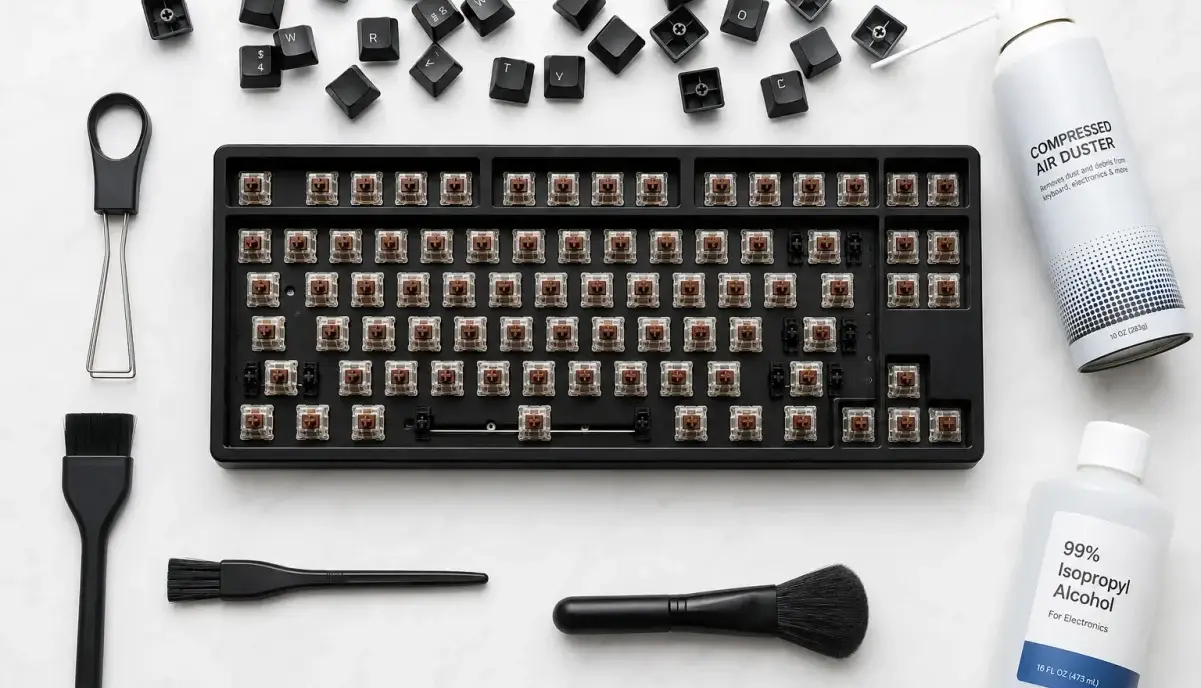
Your mechanical keyboard is an investment worth protecting. In our Trending Scenes guides, we provide practical maintenance advice for tech gear. Regular cleaning extends your keyboard’s lifespan, improves typing experience, and prevents hygiene issues. This guide provides step-by-step instructions for cleaning your mechanical keyboard safely and effectively.
Why Regular Keyboard Cleaning Matters
Keyboards harbor more bacteria than you might think. Research from the University of Arizona found that keyboards can contain 400 times more bacteria than a toilet seat. Beyond hygiene, regular cleaning:
- Prevents key sticking and chattering (debris under keycaps)
- Maintains switch performance and longevity
- Preserves the aesthetic appearance of your keyboard
- Prevents oil buildup that can degrade keycap legends
- Reduces allergens (dust, pet dander, pollen)
How Often Should You Clean Your Keyboard?
- Light cleaning (surface wipe): Weekly
- Deep cleaning (keycap removal): Every 3-6 months
- Switch cleaning (advanced): Annually or when issues arise
- Immediate cleaning: After spills or visible contamination
Tools and Materials Needed
- Keycap puller – Wire puller for standard keycaps, plastic puller for delicate keycaps
- Compressed air – For blowing out debris from switches
- Soft brush – Clean paintbrush or dedicated keyboard brush
- Microfiber cloth – For wiping surfaces without scratching
- Isopropyl alcohol (70% or higher) – For disinfecting and removing oils
- Cotton swabs – For cleaning between switches
- Bowl of warm water – For soaking keycaps (if needed)
- Dish soap – Mild soap for keycap washing
Step-by-Step Cleaning Guide
Step 1: Preparation
- Take a photo of your keyboard layout (for reassembly reference)
- Disconnect the keyboard from your computer
- Work in a well-lit, clean area
- Have all tools and materials ready
Step 2: Remove Keycaps
- Use the keycap puller to gently remove keycaps
- Start with corner keys (Esc, Enter, Shift) as they’re often larger
- Work systematically row by row
- Place keycaps in a bowl or container (don’t scatter them)
- Warning: Don’t remove the spacebar if it has a stabilizer bar unless you’re experienced
Step 3: Clean the Keyboard Base
- Use compressed air to blow out debris from switches (hold can upright, use short bursts)
- Use the soft brush to loosen stubborn debris
- Wipe the surface with a microfiber cloth dampened with isopropyl alcohol
- Use cotton swabs dipped in alcohol for cleaning between switches
- Allow to dry completely (5-10 minutes)
Step 4: Clean the Keycaps
- Place keycaps in a bowl of warm water with a few drops of dish soap
- Soak for 30-60 minutes (longer for heavy buildup)
- Gently agitate the water to loosen debris
- Rinse thoroughly with clean water
- Spread keycaps on a towel to air dry (24 hours minimum)
- Warning: Never use hot water (can warp keycaps)
Step 5: Reassembly
- Ensure all keycaps are completely dry (moisture can damage switches)
- Refer to your photo for correct placement
- Press keycaps firmly onto switches until they click into place
- Test each key to ensure proper registration
Common Cleaning Mistakes to Avoid
- Using too much liquid – Excess moisture can damage switches and PCB
- Using harsh chemicals – Bleach, ammonia, or acetone can damage keycaps and switches
- Not drying thoroughly – Moisture causes corrosion and switch failure
- Removing stabilizers unnecessarily – Reinstalling stabilizers is tricky for beginners
- Using a vacuum cleaner – Static electricity can damage electronics
- Cleaning while connected – Always disconnect before cleaning
Maintenance Tips Between Deep Cleanings
- Wipe the surface daily with a dry microfiber cloth
- Use compressed air weekly to blow out surface debris
- Wash hands before using the keyboard to reduce oil transfer
- Avoid eating over the keyboard
- Use a keyboard cover when not in use (optional)
Explore More Categories
Interested in other tech and productivity guides? Check out our content:
Frequently Asked Questions
Can I clean my keyboard without removing keycaps?
Yes, for light cleaning. Use compressed air to blow out debris, then wipe the surface with a microfiber cloth dampened with isopropyl alcohol. However, deep cleaning requires keycap removal to access accumulated debris underneath.
How do I clean sticky keys?
Sticky keys are usually caused by spilled liquid or accumulated debris. Remove the keycap, clean the switch with compressed air and isopropyl alcohol, and let it dry completely. If the issue persists, the switch may need replacement.
Can I use water to clean my keyboard?
Water is fine for cleaning keycaps (soaking in soapy water), but never use water directly on the keyboard base. Use isopropyl alcohol for the base as it evaporates quickly and doesn’t conduct electricity.
How do I clean RGB lighting?
Clean RGB keyboards the same way as non-RGB keyboards. Just ensure the keyboard is completely dry before reconnecting. Avoid getting moisture in the LED components.
Should I replace my keyboard or clean it?
Clean your keyboard regularly to extend its lifespan. Most mechanical keyboards last 5-10 years with proper maintenance. Replace only if switches fail, the PCB is damaged, or cleaning doesn’t resolve performance issues.
Final Thoughts
Regular cleaning is the best investment you can make in your mechanical keyboard. A 30-minute deep cleaning every 3-6 months keeps your keyboard performing like new and extends its lifespan significantly.
Start with light weekly cleaning (compressed air + wipe), and schedule a deep cleaning session every few months. Your keyboard (and your health) will thank you.
Want More Tech Maintenance Tips?
Explore our full Trending Scenes collection for more guides on tech care and optimization.